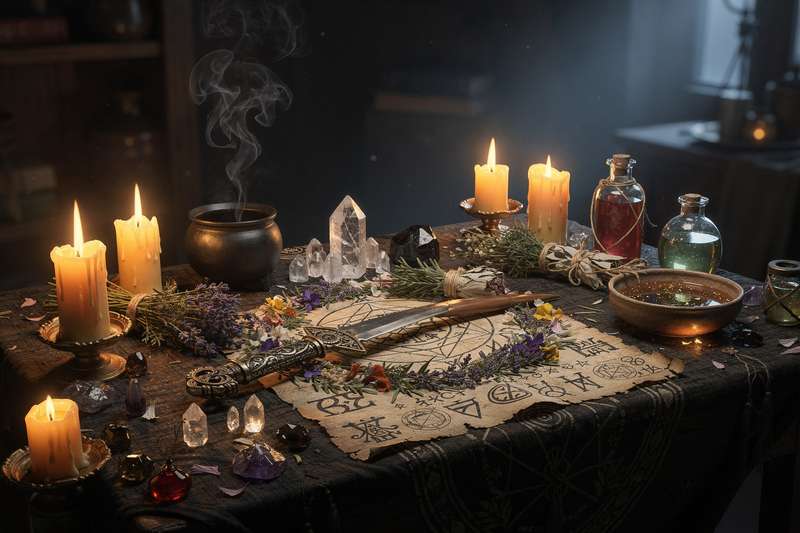
The witch bottle is one of the most enduring protection spells in folk magic — a simple, powerful, and deeply personal ward that works quietly in the background, long after you’ve sealed the lid and walked away. Archaeological finds across England and America have uncovered these bottles hidden in walls, under doorsteps, and tucked into chimneys, some dating back to the 16th century. The fact that this practice has survived for hundreds of years says something important: it works, and it resonates.
Whether you’re brand new to witchcraft or an experienced practitioner looking to add a foundational protection working to your home, this guide walks you through everything you need — what goes inside, how to assemble and charge it, where to place it, and how to care for it over time.
What Is a Witch Bottle?
A witch bottle is a sealed container filled with a combination of sharp objects, protective herbs, crystals, and personal items, charged with protective intention and hidden or buried in or around the home. Its purpose is threefold: it acts as a decoy, drawing harmful energy away from you; a trap, catching and neutralizing negativity before it can reach you; and a shield, creating a continuous protective ward around your space.
A common myth is that witch bottles are purely dark or aggressive magic. They’re not. They are fundamentally defensive — designed to protect, not to harm. Another misconception is that you need rare or expensive ingredients. Traditional bottles were made from whatever was at hand: household nails, garden thorns, kitchen herbs. This is folk magic in its truest sense — accessible, grounded, and deeply practical.
Witch bottles are appropriate for practitioners of all paths: Wicca, eclectic, hedge witchcraft, kitchen witchcraft, and secular practice alike. There’s no single right way to make one.
Types of Witch Bottle Protection Spells
Not all witch bottles serve the same purpose. Choosing the right style helps you focus your intention and select appropriate ingredients.
Traditional Home Protection Bottle
This is the classic form — iron nails, thorns, protective herbs, salt, and a personal item such as hair or nail clippings. It’s buried under the front threshold or at property corners to create a strong, long-lasting ward against general harm, curses, and unwanted energy.
Psychic Protection Bottle
Designed specifically to guard against psychic intrusion, energy vampires, or spiritual attack. It typically includes amethyst or black tourmaline, mugwort, lavender, and mirror pieces to reflect harmful psychic energy back to its source. It works particularly well for empaths and highly sensitive people.
Reversal Bottle
When you suspect negativity has already been directed your way, a reversal bottle focuses on sending that energy back. It uses mirror fragments, vinegar, nettle, and black pepper — ingredients with a sharp, returning quality. This bottle says: what you sent here is no longer welcome.
Modern Decorative Bottle
If burying isn’t practical — perhaps you rent, live in an apartment, or simply prefer a visible ward — a beautiful layered bottle displayed near your front door or on your altar works well. These typically omit personal fluids and liquids so they can sit openly without risk of leakage or odor. They’re just as intentional, simply styled differently.
Targeted Protection Bottle
You can build a bottle for a specific concern: safety during travel, protection of a child’s bedroom, warding against a difficult neighbor or coworker. The key is choosing ingredients whose properties align with that specific focus and stating your intention clearly when you seal it.
How to Make a Witch Bottle: Step-by-Step
The following method creates a traditional-style protection bottle suitable for burying or concealing. Adjust ingredients to suit your path and purpose.
Step 1 — Gather Your Materials
You’ll need a glass jar or bottle with a tight-fitting lid (a mason jar, small wine bottle, or apothecary bottle all work well), sharp objects such as iron nails, straight pins, needles, or rose thorns, protective herbs, salt, an optional personal item, and sealing wax. Wear gloves when handling broken glass or razor-edged items. Set everything out on your workspace before you begin so you can move through the process without interruption.
Step 2 — Cleanse Your Space and Tools
Before assembling anything, take a moment to cleanse both your space and your materials. Smoke cleansing with rosemary or sage, sound cleansing with a singing bowl, or simply holding each item and consciously clearing it with your breath all work well. You want to start with a clean energetic slate — you’re building a protective tool, and it should be free of any residual energy from before.
Step 3 — Add Your Sharp, Protective Items
Sharp objects are the core of any protection bottle. They pierce, destroy, and create an inhospitable environment for harmful energy. As you add each item, hold it briefly and visualize it cutting through negativity before it can reach you. Traditional practitioners used nine nails, nine pins, and nine thorns — the number nine carries strong protective symbolism — but use however many feels right. Broken mirror pieces can also be added here to reflect energy back to its origin.
As you place each sharp item, you might say something simple: “You guard this home. You cut through all that harms.”
Step 4 — Layer In Your Protective Herbs
Herbs add layers of specific protective energy and fill the bottle beautifully. Classic choices include rosemary (strong, general protection and clarity), sage (cleansing, clearing), bay leaves (protection and strength), and nettle (a powerful reversal and warding herb). Add a generous pinch of each. If you’re building a specific-purpose bottle — psychic protection, for instance — add mugwort and lavender here instead. Trust your instincts; folk magic has always made room for intuition.
Step 5 — Add Salt and Crystals
Salt is one of the oldest purifying and protective substances in human history. Fill another layer of your bottle with regular sea salt or — if you have it — black salt, which carries extra protective and banishing associations. If you’re including protective crystals, add them now: small chips or tumbled pieces of black tourmaline or obsidian are excellent choices. Both are well-regarded in modern crystal work for their grounding and shielding properties.
Step 6 — Add Your Personal Link (Optional but Powerful)
A personal item creates a direct energetic connection between the bottle and you, so that harmful energy aimed at you is drawn to the bottle instead. Hair, nail clippings, or a few drops of blood from a gentle finger prick are the most common modern options. Historically, urine was considered the most potent personal link, and some traditional practitioners still prefer it — there’s no judgment either way. If you’re making this bottle for your whole household, ask willing family members to contribute a strand of hair each. This is entirely optional; the bottle will still work without it.
Step 7 — Add Liquid (Optional)
A small amount of liquid can activate the protective chemistry of the bottle. Vinegar carries a souring, reversing energy — it turns sweet intentions sour, sending them back where they came from. Red wine is traditionally used as a blood substitute, connecting the bottle to life force and vitality. You can also leave the bottle completely dry, which makes sealing and placement easier and is perfectly valid.
Step 8 — Seal It With Wax and Intention
Close the lid tightly. Then drip black or red wax over the seal — melting a candle directly over the lid works well. As the wax drips, speak your intention clearly aloud. Your own words carry more power than any borrowed script, but if you’d like a starting point, something like: “This bottle protects my home from all harm. It catches, traps, and destroys any negativity sent to this space or to those who live here. So it is sealed, so it is done.” Visualize the bottle glowing with a strong, steady protective light as you finish.
Step 9 — Place or Bury Your Bottle
Burying under your front doorstep is the most traditional and most powerful placement — the idea is that every person who enters crosses over your protection. If that’s not possible, burying it as close to the main entrance as you can manage works well. You can also bury one bottle at each corner of your property to create a full boundary. For renters or apartment dwellers, concealing the bottle in a closet near the front door, behind books, or beneath a floorboard are all viable options. A decorative bottle can sit openly near your entrance or on your altar.
Essential Tools and Supplies
You don’t need to spend a lot to make an effective witch bottle. Here’s a simple starter list:
- Container: Any glass jar or bottle with a secure lid. Mason jars are ideal.
- Sharp objects: Iron nails, straight pins, needles, rose or blackberry thorns, broken mirror pieces.
- Protective herbs: Rosemary, sage, bay leaf, nettle — all widely available and inexpensive.
- Salt: Sea salt or black salt (black salt is salt combined with activated charcoal or ash).
- Crystals (optional): Small chips of black tourmaline or obsidian.
- Personal item (optional): Hair, nail clippings, a few drops of blood.
- Sealing wax: Black or red candle wax dripped over the sealed lid.
- Gloves: For safe handling of sharp materials.
Most of this can be sourced from a dollar store, garden, or kitchen. Folk magic has always belonged to everyday people — keep it simple.
Ethics and Best Practices
Witch bottles are protective and defensive by nature, which places them well within most ethical frameworks for magic. A few things worth considering:
Intention matters. Build your bottle to protect, not to harm. There is a meaningful difference between a bottle designed to neutralize harm sent your way and one built to actively harm a specific person. Stick to protection.
Consent within your household. If you’re adding hair or personal items from family members, ask first — especially for adults. Their energy, their choice.
Inform future residents. If you sell or move out of a property where you’ve buried a bottle, consider either retrieving and disposing of it properly, or leaving a note for the new owners. Unexpected finds can cause confusion or distress.
Cultural awareness. Witch bottle traditions are rooted in European folk magic. Appreciate the history; be mindful if you’re drawing from traditions outside your own background.
Common Beginner Mistakes
- Forgetting where you buried it. Mark the location carefully, especially if you bury it close to landscaping or a path. A small inconspicuous stone or plant marker helps.
- Skipping the personal link and wondering why the bottle feels less effective. The connection between the bottle and its owner matters. Even a single strand of hair makes a real difference.
- Using a container that leaks. If you’re adding liquid, test the seal before burying. A leaking bottle underground loses its integrity quickly.
- Rushing the sealing ritual. The spoken intention and visualization as you seal are not optional extras — they’re the activation. Take your time here.
- Assuming one bottle protects forever without any awareness. While witch bottles are low-maintenance, pay attention to signs that the energy has shifted — a cracked bottle, a weakened feeling of protection after a difficult period, or a broken seal all suggest it’s time for a replacement.
- Over-complicating ingredient lists. More ingredients don’t automatically mean more power. A simple bottle made with clear intention outperforms a complicated one made with distraction or doubt.
How to Build Your Practice Over Time
A witch bottle is a wonderful first protection working precisely because it’s tangible and lasting. Once yours is in place, you might find yourself naturally drawn to other complementary practices — protective sigils, threshold cleansings, or seasonal home blessings. Let curiosity lead you.
Some practitioners make a new protection bottle each year as a deliberate ritual of renewal, even if the old one is still intact. Others make one and leave it for the life of the home. There’s no wrong answer. What matters is that your practice stays connected to your actual life and intention — not to someone else’s rules about what witchcraft is supposed to look like.
Keep a journal of what you put in your bottle and when you made it. Over time, you’ll build a personal record that’s genuinely yours.
Maintaining and Disposing of Your Witch Bottle
A buried or hidden witch bottle generally requires no ongoing maintenance. However, if the bottle cracks, the seal breaks, or you simply feel that its energy has been exhausted — perhaps after weathering a particularly heavy period of negativity — it’s time to retire it.
To dispose of a bottle respectfully: retrieve it carefully, thank it for its service, and then break it to release the trapped energy. Bury the broken pieces away from your home, or dispose of them in moving water if possible. Then make a fresh bottle if you still feel the need for protection.
If you move home, take the bottle with you or properly dispose of it before you leave. Don’t leave a charged, personal-link bottle behind for someone else to unknowingly inherit.
Final Thoughts
The witch bottle is folk magic at its most honest: simple materials, clear intention, and a deep trust that you have the right to protect your home and the people in it. It asks very little of you in terms of ongoing effort, and it gives back a quiet, steady sense of security that many practitioners find deeply reassuring. Make yours with care, seal it with purpose, and place it where it can work undisturbed. Your home deserves that protection — and so do you.
Frequently Asked Questions
Does a witch bottle really need to be buried to work?
Burying is the most traditional and generally considered the most powerful placement, but it isn’t strictly required. Concealing a bottle inside your home — in a closet near the entrance, beneath a floorboard, or in a basement — works well. Displayed decorative bottles also function effectively when charged with clear intention, though they’re typically made without liquids or personal fluids.
How long does a witch bottle last?
A properly sealed and buried witch bottle can theoretically last for decades — historical examples have been found intact after several centuries. In practice, most modern practitioners either replace theirs annually as a renewal ritual or simply leave it in place indefinitely. Replace it if the bottle cracks, the seal breaks, or you sense the protection has significantly weakened.
Can I make a witch bottle without adding personal items like hair or blood?
Yes, absolutely. Personal items strengthen the bottle’s connection to you, but they’re optional. A bottle filled with sharp objects, protective herbs, salt, and crystals — sealed and charged with strong intention — is still an effective protective ward. Many practitioners prefer to omit personal items, especially when making bottles for display rather than burial.
What should I do with a witch bottle when I move house?
You have two options: retrieve it and either take it with you or dispose of it properly, or leave a note for the new occupants explaining what it is. Leaving a charged, personal-link bottle behind without disclosure isn’t generally considered good practice. To dispose of it, break the bottle to release the trapped energy and bury the fragments away from your home, or discard them in moving water.